This is the part three of the series about Advanced Newtonian Telescope Collimation. Here are Part 1 and Part 2.
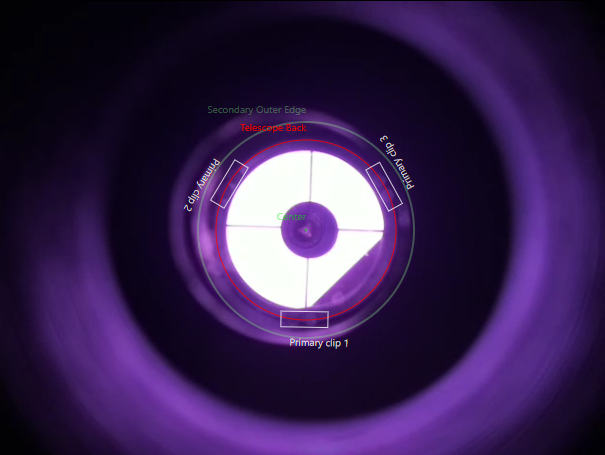
After colimating secondary mirror, it's time to check primary as well. This step is a little harder for me, because camera reflection is really faint. Usuali this step is done with reflective collimation cap, but with that we would change our optical path and we don't want to do that.
If you look closely at the left image, you can see faint black circle sourounding triangle on the primarry mirror reflection. That's our eyepiece camera lense. And that should be centered with primery mirror reflection.
I have used Collimation Circles application to highlight that part, with a circle named Camera. Now use collimation bolts on your primary mirror to get that camera lense aligned with Camera circle.
After doing that, you have perfectly colimated Newtonian telescope, ready for visual observing and for astrophotography too! Isn't that just amazing!
I hope you enyojed this advanced newtonian colimation series. If you did, please left 5 stars below.
Clear Skies!


Add comment
Comments
Your final alignment (centering the primary mirror center marker relative to the camera reflection in the secondary mirror reflection) is correct--although a calibrated Cheshire would likely provide better precision. But the final secondary mirror placement is NOT optimal for imaging, and the critical focuser axial alignment (assuming a coma corrector will be used for imaging) is suspect without the third reference circle (the bottom edge of the focuser drawtube). The problem I've seen with most video collimation tools is getting the camera axis centered AND coaxial relative to the focuser (drawtube) axis.